Monday, October 29, 2012

Pumpkin!

This is my cheeseburger pumpkin I made this year for Halloween! I cut the pumpkin in half and glued the seeds from the inside to the top to make it look like a bun.  I used play dough to make the patty and all of the toppings.  I also hallowed out the inside of the pumpkin and filled just the bottom with some paper towels before I put it all together!

Sunday, August 26, 2012

JELLO CAKE

{Ingredients}
1 box cake mix
1 Lg. box of jello
2 eggs
1/3 C. oil
2/3 C. water
bundt pan
Whip Cream 


{Recipe Instructions}
Mix everything in a bowl until well blended.  Pour batter into a well greased bundt pan.  Cook for 30 minutes at 350 degrees.  It might look slightly undercooked compared to a normal cake after 30 minutes but its done!  Let cool for about 20 minutes or until its cool to touch.  flip cake out onto serving plate and garnish with some whipped cream! Enjoy!


Sunday, August 12, 2012

Cute Teacup!

Hi everyone!  So there is this cool paint its called enamel paint. You use this awesome paint on ceramics or glass to make things look oober cute!  I love the chevron print so I painted that on mine.  This idea could be used for birthdays or Christmas!  You can basically put whatever you want on the outside to make it personal.

{Supplies}
I got this cute over sized teacup at the thrift store for only $1 and this paint was less than $3 and I barely used any for this! So basically go to town! Paint what your heart desires, I have to warn you though this paint is not supposed to come in contact with food.  With that said only paint the outside and if your drinking out of it make sure all of the paint stays lower than where you would drink from!
My Chevron print..not the greatest, but you get the point!
Your done!  The directions state to either let air dry for 21 days...um no! Or you can stick your item in a cool oven heat to 350 degrees bake for 30 min. then let cool in the oven.  I chose this option..clearly I'm too impatient to wait 21 days! So after your done baking it will look exactly the same its just baked on now! I have a cute new cup to eat my oatmeal out of in the mornings or whatever!
OH..Hand was with soap and water or top rack safe for dishwasher :)

Sunday, August 5, 2012

DIY Camera Bag/Insert

Alright so I decided to make a camera bag/insert to match my strap!  this is fairly easy and I'll show you what I did to improve my bag, but also the insert. So if you have a really cute purse you want to tote around your camera stuff in you can slip the insert into most bags!

 {Supplies}
My bag from savers 2.99! I only used the the metal square hooks and the pink fabric sorry I intended to use the other items, but i decided to make it less confusing! I also didn't take a picture of my foam square it was a 1 in. x 15 in. x 17 in. you can get them at Joann or Michael's for pretty cheap.  You will also need needle and thread to match your colors.
Iron on hem! I love this stuff!

Material for your new strap (if you need to make a new one some might just have to make the insert!) I went for a wide burlap to match the bag and some bright pink ruffles to jazz it up!

 So first things first lets get rid of those ugly straps on the bag!  All you have to do is cut along the hem close to the handle to remove it (not the whole hem just the hem where the handle is attached to the bag). Then sew along the same hem line overlapping into where your hem is still sewn together to close your holes.


Now that you've removed the handle you need to remove the hem and sew in your square metal attachments.  I wanted a messenger bag look so I inserted mine on the two sides of my bag.


Ruffle time!  This was super easy I just laid down a strip of iron on hem to my strap then ironed on my ruffles!


Attach your strap to your hooks!  I just measured the length that I wanted it to hang and folded about 2 in. of strap through the hook and sewed the two pieces to each other. I repeated the same step for both sides. Now don't be afraid to go over board when sewing in your hooks and strap. Its holding all of your precious things so you want it secure!


So your bag is pretty much done!  This bag doesn't have any closures on it, the ones i bought for this in the supplies pictures didn't work well with the fabric, but I think I'm going to get some Velcro to sew in to do the trick, but you can use whatever you like!

So on to the insert!  I've been seeing these really cute camera purse bags so I figured I would just make the insert so if you want to switch it up now and then you just slip the insert in and your off!

I started out by measuring my camera, lenses and bag.  This is just measurements that I needed for mine so not everyone's will match.  I've noticed with my insert it is pretty universal to fit into most of my hobo/satchel bags!

I cut my foam squares to the measuremnets I needed I will give you the breakdown 
Bottom 1 ft. x 4 in. 
End Sides for Lens 8 in. x 3 in.
Lens holders 10 1/2 in. x 4 in.
Sides Front/Back 5 in. x 7 in. (this I think you can increase to 7 in. x 8 in. if you want)

This is what some of your pieces will look like


Now measure and cut your material out, but increase your material length by 1 in. each way to allow for hemming.  Hem the wrong sides together on 3 of the 4 sides leaving one open to put in foam insert. flip right side out then once its in hem the remaining side. I used iron on hem for this part too! You can also take a big piece of foam cut out enough length for the bottom and sides and do the same steps to cover it then surge down where you want your sides to fold. It takes out a couple of steps, but I don't have a sewing machine or a foam piece long enough so I just pieced mine together separately.

They will look like stuffed sausages! :)
This was an example I found if you wanted to do one big piece rather than piecing together

Now its just personal preference on how you make your insert you can adjust and make it how you like this is just how I did mine. All you do is sew together your foam pieces to how you want your insert laid out!


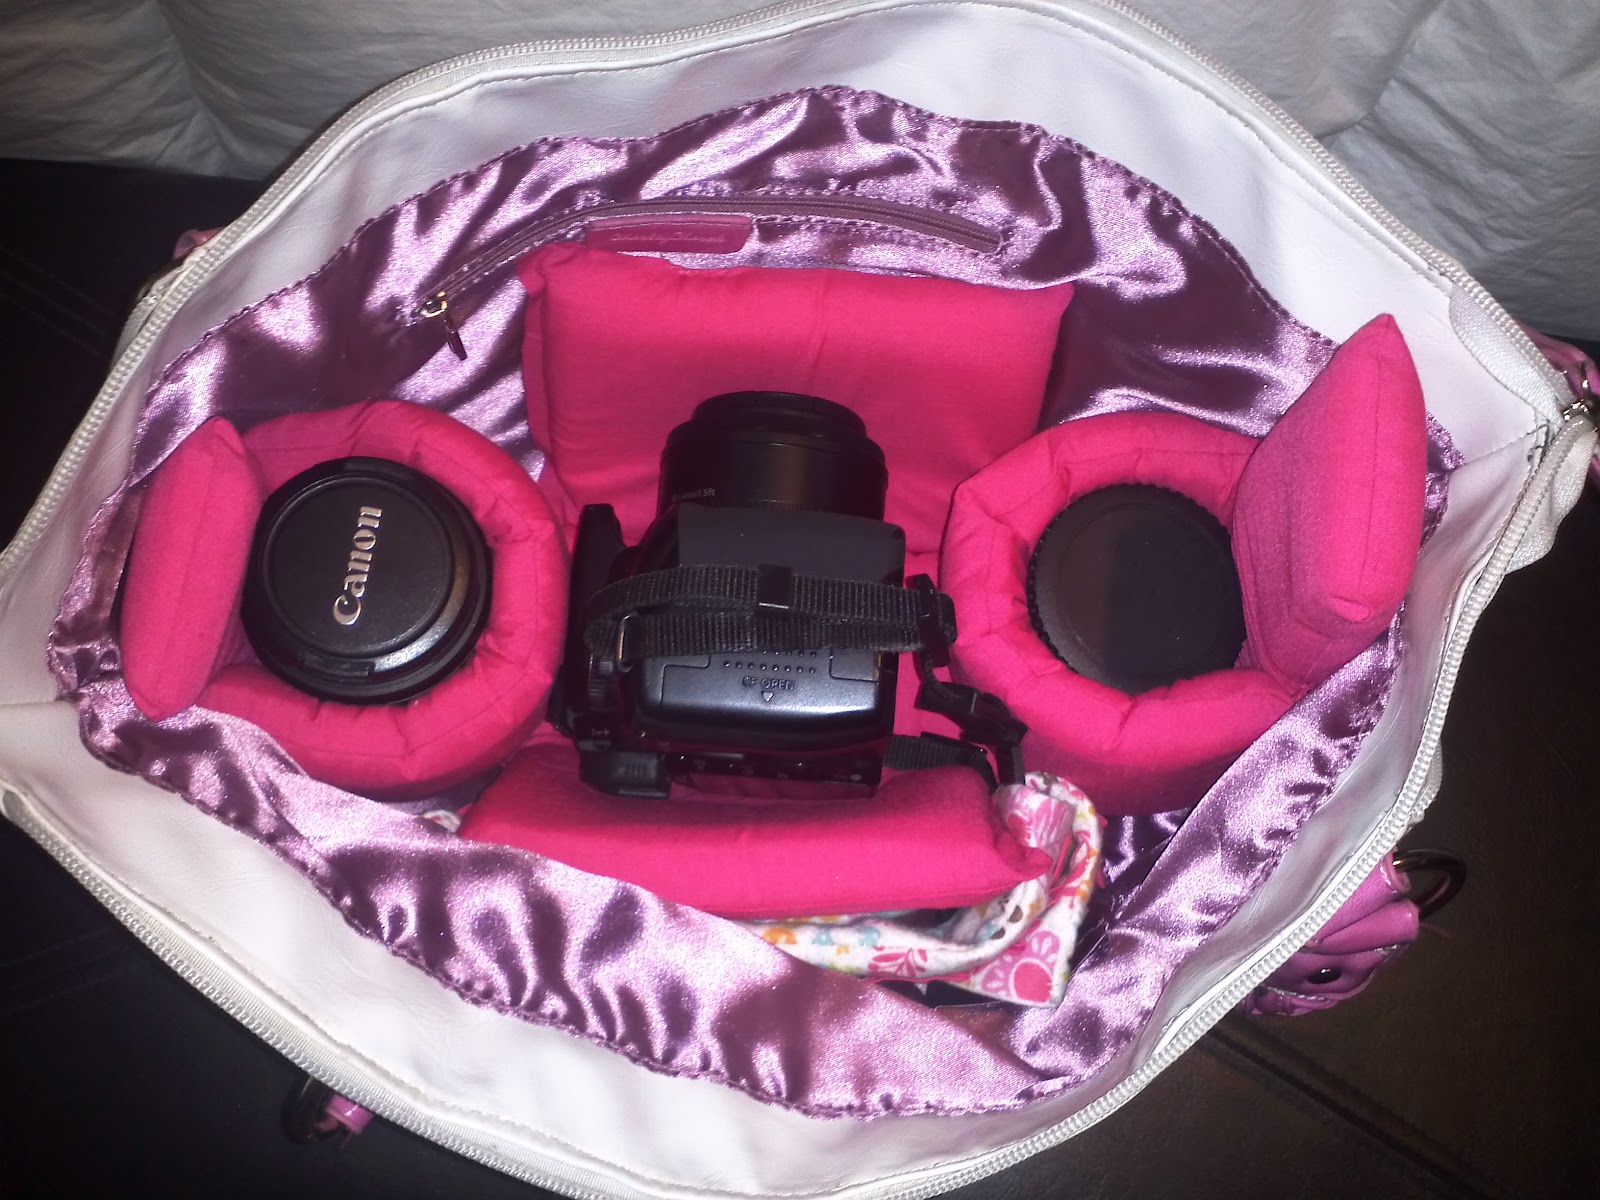
Now you can put your insert into whatever you want!


 So you want a different purse today no problem!


Friday, August 3, 2012

Ruffled Camera Strap Tutorial

Alright so I saw this really cute camera strap on Etsy the only down side was it was like $40 to buy it! Total Bummer, but I thought well I could go shopping and make one. So I went to the thrift store and found a bag to make into a camera bag as well to match my strap.  I also went to JoAnn fabric and in total only spent $15!

{Supplies}

Fabric, adherable padding, camera strap

Im not great at sewing, but I can sure use the crap out of this stuff!
So first start out by measuring how long your strap is.  You will need to have two strips of your fabric this length and two strips of your adherable padding. I just folded my fabric over pinned my strap to it and cut leaving about a quarter of an inch on each side.
You will need the extra on the side for after you sew.
So once your fabric is cut out if you've done it like me you will need to cut the folded end apart so you have two separate strips of fabric.
 
Two sets of padding and fabric same length
 You need to now hem the ends of each of your fabric strips. About a quarter of an inch on the ends so their is no fraying.  I just used the iron on hem to do the ends.  You want to hem them facing the inside of the fabric you wont see!
  Now its time to make the ruffle.  I cut mine the same width as my fabric strips and about twice as long as one of the strips so you have enough fabric to make the ruffles.
Once you have your strip cut out you need to hem the ends of this as well just do the same steps from before!
 Now you need to fold the strip in half length wise and the good side of your fabric facing each other and sew them them together. I again used iron on hem for this because I suck at sewing!  Once that is done you need to sew one end of your folded strip, but before you do attach a safety pin inside so you can push the right side through once your done.
Important step don't forget!
So you know when the strings of your sweat pants fall out in the laundry and you attach a pin to get it back through you pants.  Well this is the same concept you pretty much want to weave the right side back out.  Push up on the safety pin and your fabric will start to gather and keep doing it until its right side out.  Your strip should be half the width of what it was and now iron it flat.
Now sew a running stitch down the center of your strip and as you pull down on it you can bunch it until you get the ruffled effect you desire.

So Iron on your padding to one of the back sides of your fabric strips.  On the other one you want to sew your ruffle down the middle.  I placed a strip of iron on hem to keep the ruffle in place because I don't have a sewing machine so I have to hand sew everything. Then iron on your padding last.
So this is what you should have so far
Now sew your two pieces of fabric right side together so that way when you flip it back out you will have a nice hem. You only want to sew the long sides together the two ends will need to be open so you can slip your strap through.
After I was done painstakingly sewing mine I flipped it back out and Ta-Da! This is my new camera sleeve!  I'm sure if you had a sewing machine and you can sew a little I'm pretty sure you'll have one that looks slightly better! This is great because you can slip it on and it doesn't ruin your strap if you ever want the original back!


Saturday, July 28, 2012

Ombre Glitter Nails

So I saw this oober cute manicure on Pinterest so I thought I'd try it out! This post is kind of a "twofer" (two for one) deal because I wanted to try out the stick your nails in cold water trick to see if it really worked.

{Supplies}
Nail Polish Remover
Small Brush
Piece of Paper
Glitter (mine was a 4 pack) $2.97
Sally Hansen Clear $1.92
Sally Hansen Color $1.92
Q-Tip
Bowl of Water


Alright so I start out by filing the tops of my nails a little just so the polish sticks and to also try to prevent chipping.
Sorry may nails aren't the prettiest!


So I like to set up everything on a piece of paper just so when I start putting the glitter on I can have an easy clean up! I also fill the lids with the glitter and nail polish remover.
Start by painting one nail at a time when the nail is sort of tacky still you will need to dip your brush into the glitter then start dabbing it on your nail. (I used one of my make-up brushes you can swirl it in remover and wash it with soap and water when your done) Now concentrate the glitter where you want it to be the darkest because when you put the clear coat on it will drag some glitter down the nail giving you that ombre effect.
Tip: For removing the oopsie polish spots take a Q-Tip and remove almost all the cotton on the ends so there is only a little left and dip it in polish remover.  You can rub this on your skin and get it into those close spaces! If your really picky you can rub with the Q-Tip first then take a toothpick and scrape along where your skin meets the nail.
  After you get your nails the way you want them apply the clear coat.  Wait about one minute then stick your hands in a bowl of ice cold water for about 2 minutes.
So this really does work for drying your nails I was pretty impressed I think it would be great for kids because it's fast.  The post I read about this was that you were able to rub off all your oopsie polish spots after soaking it in the water. I personally didn't think it worked all to well for that, but will definitely use it again for drying! 

And Voila! Glitter ombre nails!


Thought process after getting my hair done...

SO I decided to do a timeline of emotions yesterday after getting one of those "body wave" perms.  I think most women can relate this!

Wednesday, July 25, 2012

Quick Girly Tip!


Have you ever been out with the girls or on a date and go to the restroom and you look in the mirror and your face has some unwanted shine?!  Well I have just the thing!
Grab one of those toilet paper liners (unused of course!) and us it to blot that oil right off your face!!
 See the oil comes off and leaves your makeup untouched!
Best part of this-it's FREE!!

Sunday, July 22, 2012

DIY Mosaic Tile Mirror


Hi everyone!  So this post I will show you the original Pinterest mirror and my DIY mirror how-to.  The mirror they did was only $18 no too bad, but mine was under $10!


Pinterest


 {SUPPLIES}

 Aleene's 4 oz. Tacky Glue $1.49
Super Glue (pack of 4) $1.97
Tile $4.99 (on sale for 1sq. ft.)
Nail File 
Scissors
Mirror
Patience
Total Price: $8.45
{The scissors, nail file and mirror I'm going to assume everyone has those somewhere in their house}

Alright so I just went to the local Home Depot you can go wherever you like to get your supplies.  The tile is personal preference whatever your style may be. I of course went for the cheapest and shiniest tile I could find! I also want to make a note that instead of using super glue and tacky glue you could buy a 100% silicone based glue it looks like a tube of super glue.  I didn't only because I had this at home already. I apologize I'm missing some pictures for some of the steps when I originally did this I didn't know it was going on the blog!  

{Step 1}

Start pulling off all your tile pieces from the webbing that its stuck to.  I only bought 1 sq. ft. of tile because my mirror is only 3 ft. x 2 1/2 ft. and the individual tiles are about a 1 in. x 1 in. tile and I used all but 2 rows.

{Step 2}
Sorry no picture for this step!  You should line up all your tiles around the edge of the mirror so you know how much you need before you start gluing. This step also gives you a chance to rearrange tile colors if using more than one color or a tile that has gradient colors like mine.

{Step 3}
 This step will vary for every person depending on your mirror size. For mine I needed to trim down two pieces of tile for two corners to make them fit. Some of you might not have to do this step at all.
WARNING: If you do not feel comfortable doing this you can go to home depot and let them know how big you want them and they will usually cut them down for free, but if you don't really care like me you can do it this way, but please be careful and do this step outside or on a counter!
Cut tile to size you need

Tile will break apart when your cutting it so carefully collect the left overs!

Then file the edge of the tile to make it dull
This is what the cut tile will look like when glued on

 {Step 4}
 Now here is where your patience comes in.  You will need to start gluing down your tiles one by one! 


I did 2 small lines of tacky glue and 1-2 drops of super glue in between the lines to kind of contain it.  I figured out after only trying to use super glue it was kind of messy and it doesn't really grip right away and your stuck holding it for a couple of  minutes. This is why I use the tacky glue, it will stick right away on the mirror which will speed up the process a little bit and the super glue will just give you extra hold once its dry! If you are using the silicone just a dab will do.  This process for my mirror took me about 2 hours.  

{Step 5}
This is the easiest step!  Wait for your tiles to dry.  It took mine about 2 hours so I got on Pinterest of course!

{Step 6}
Hang your pretty new mirror back up! I had my husband help me just so I could be sure not to bump it and break any tiles off so you may want to recruit someone! This is my finished product!

Thanks for looking! I hope you all can make a new mosaic tile mirror!